
Navigating the filesystem and transferring data to and from the hub#
🔍 OVERVIEW
Questions
Where do I store files on the hub?
How do I transfer data to and from the hub?
How do I authorise GitHub to push and pull code to the hub?
Objectives
Recognise and locate your home directory in the JupyterLab and RStudio user interface
Distribute read-only datasets to all hub users in a shared directory
Push and pull GitHub repositories to and from the hub with
gh-scoped-creds
Home directory#
A hub server comes with its own filesystem that is private to the user and not shared with other hub users. Every user on the hub is given the username jovyan[1] and their home directory is located at
/home/jovyan
Both the JupyterLab and RStudio user interfaces will automatically open the file explorer in the user’s home directory in the first instance when a server is launched (see Fig. 8 and Fig. 9).
Files saved in the home directory are persistent and are available on the hub each time a user shuts down and starts a server.
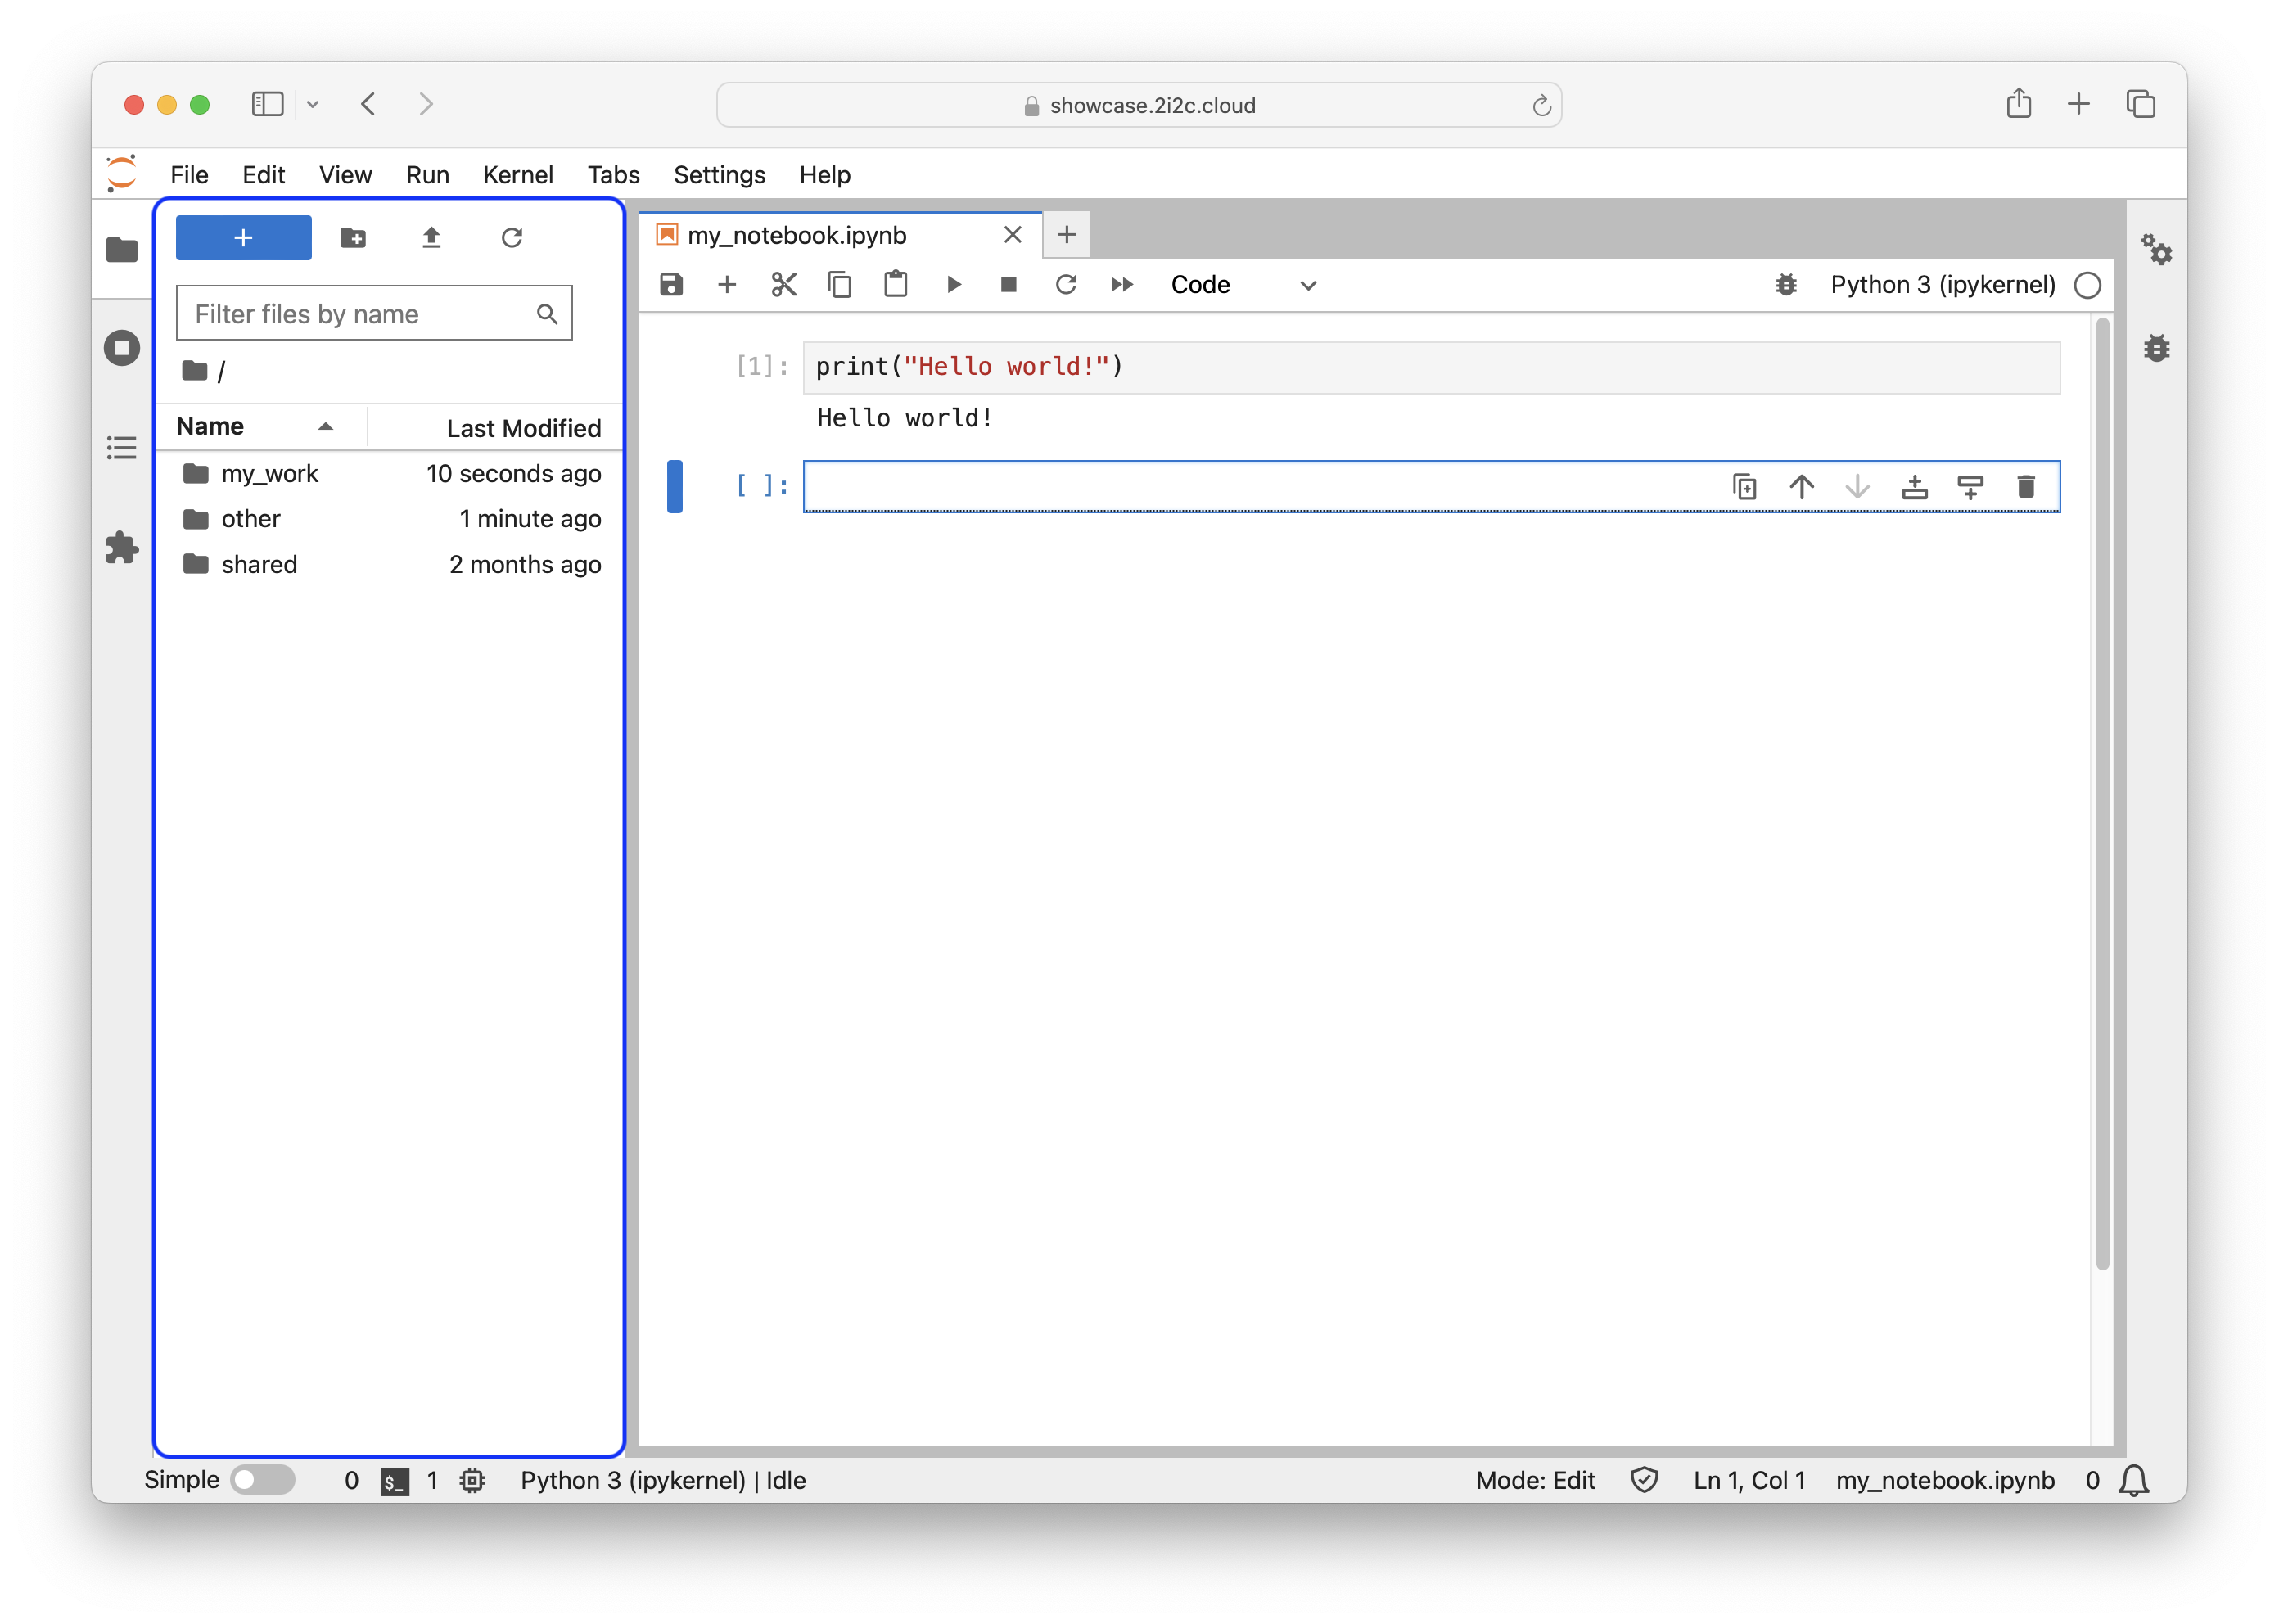
Fig. 8 The file explorer (highlighted with a blue box) in the JupyterLab user interface.#
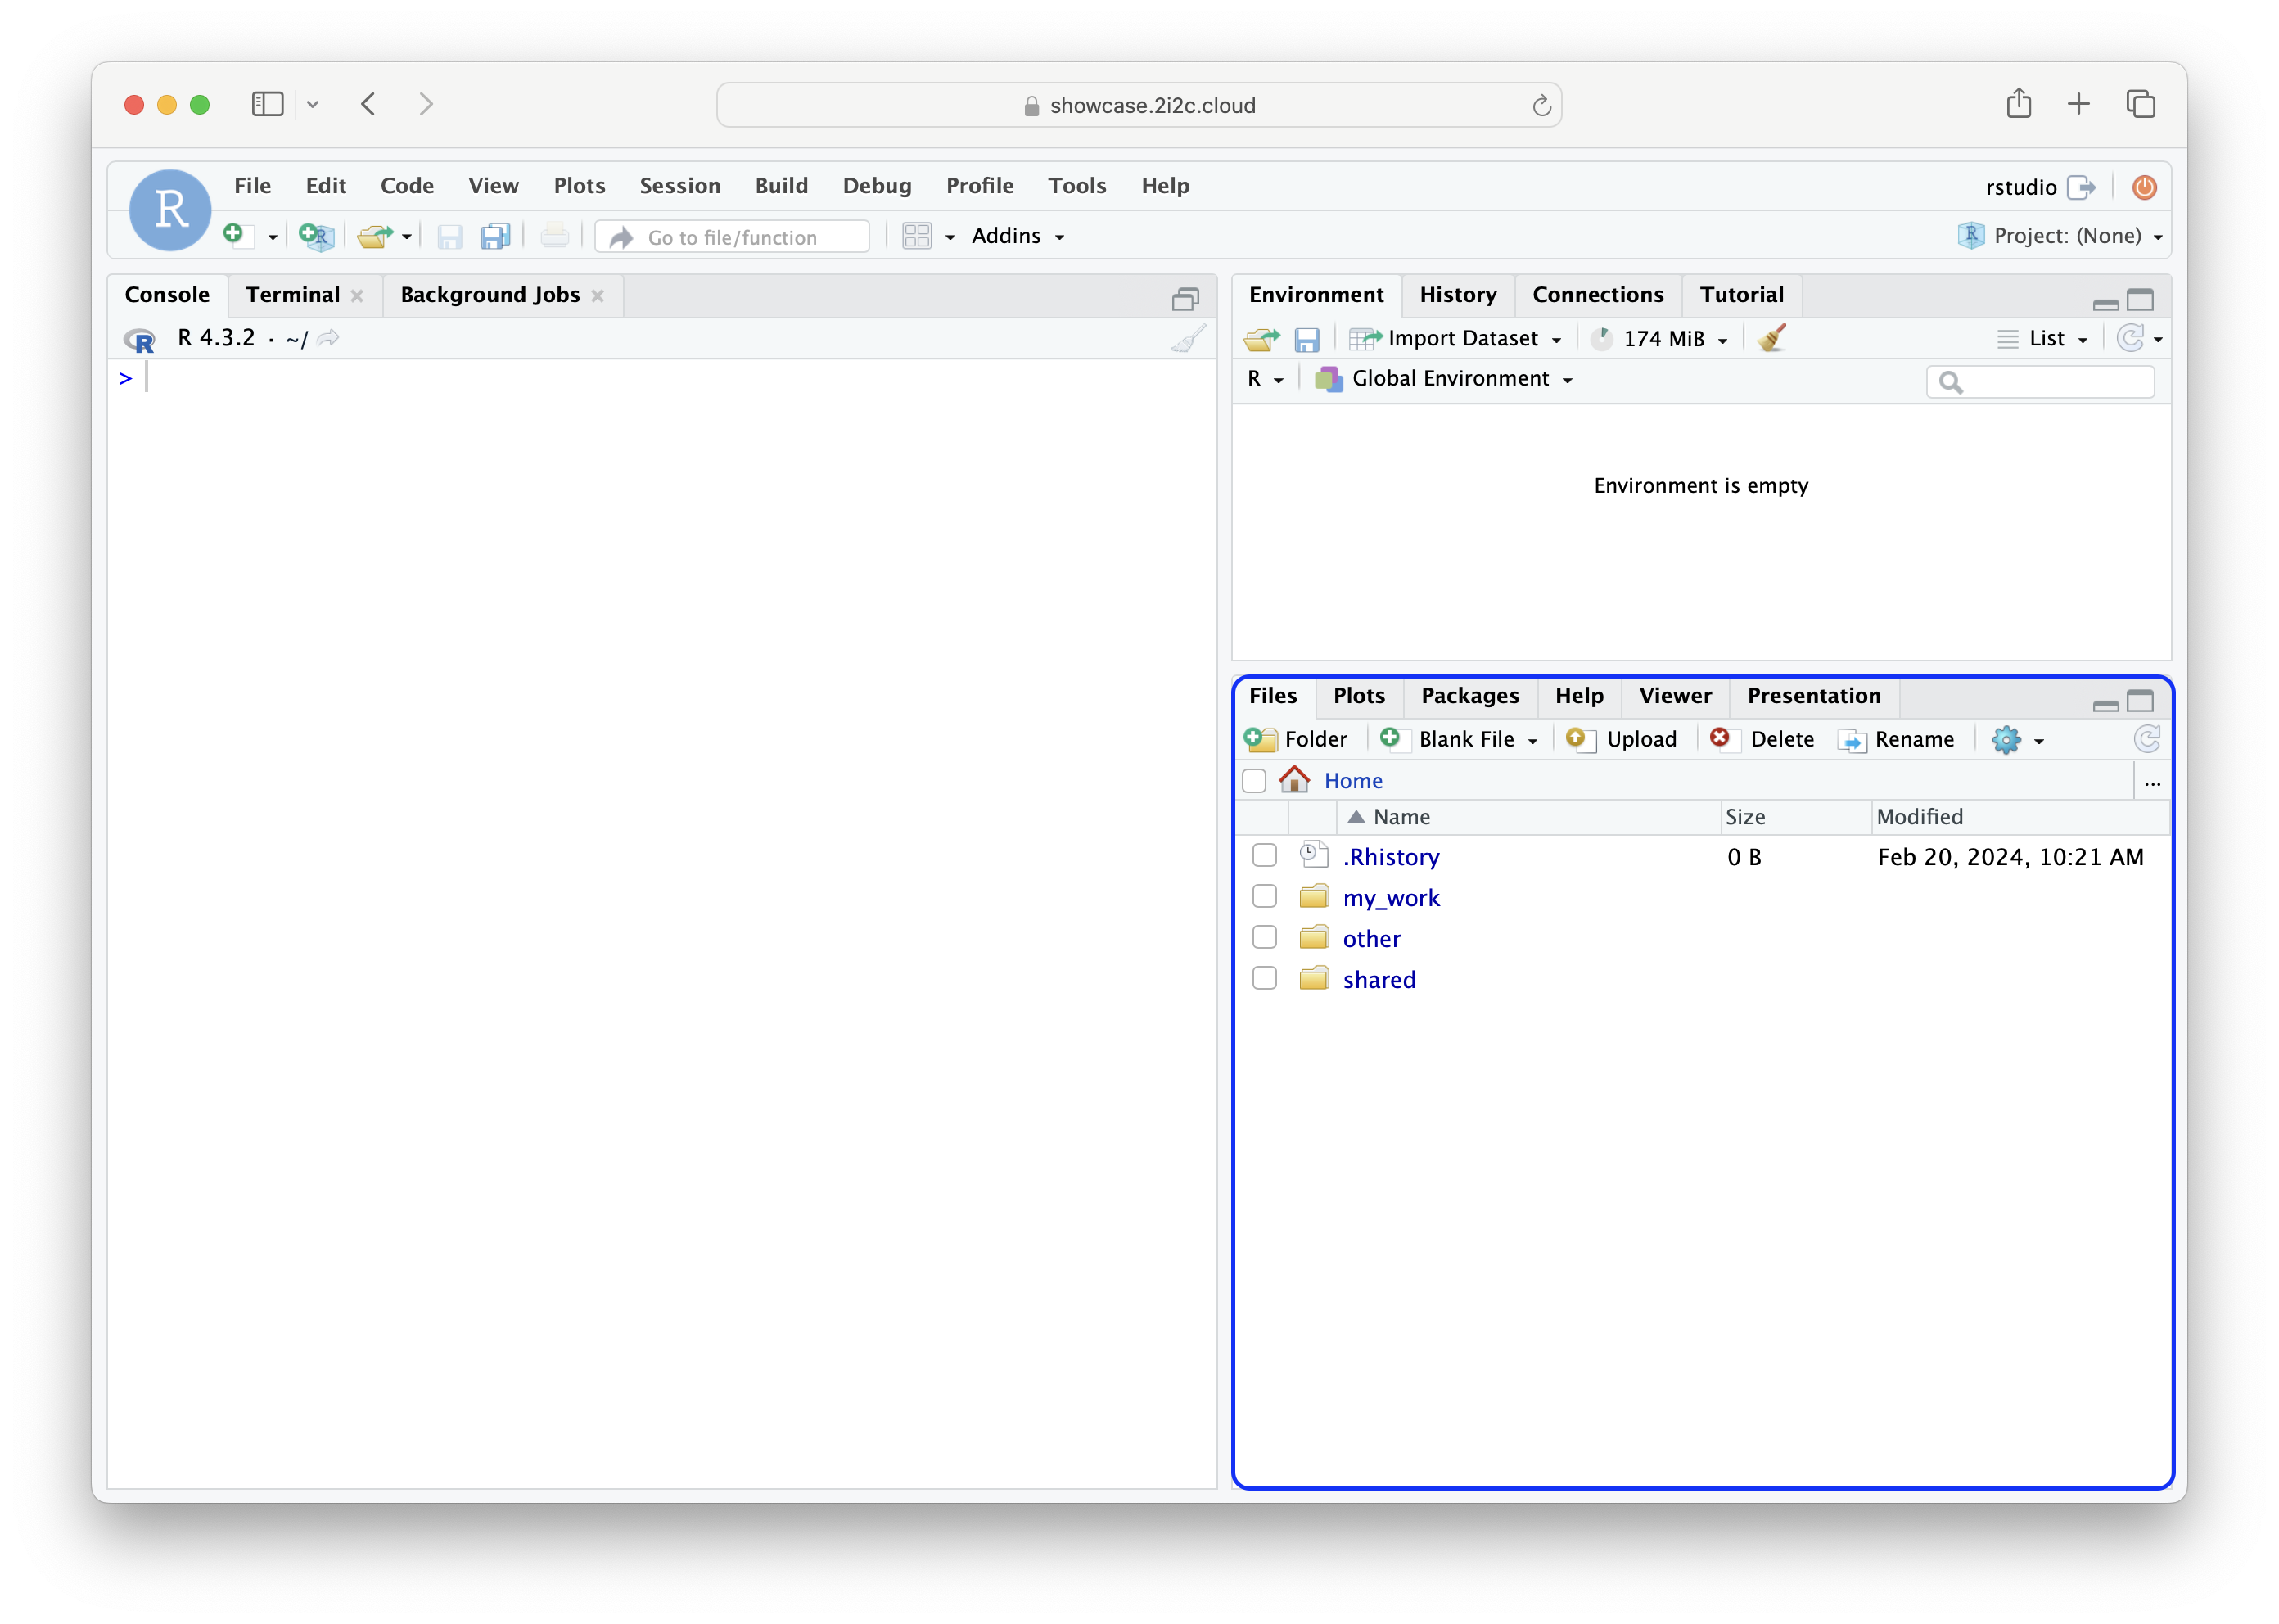
Fig. 9 The file explorer (highlighted with a blue box) in the RStudio user interface.#
The storage quota for home directories is not capped and storage costs are charged per gigabyte. Therefore we strongly suggest this space is used for small files and datasets and is not suitable for storing large datasets.
Tip
Hub champions are responsible for costs incurred from data storage and ensuring their communities understand the potential expenses incurred.
Exercise: What can you store in your home directory?
Select all that apply:
Notebooks
Code
Large and/or shared datasets with read-write permissions
Text files
Small datasets
Configuration files
Read-only datasets, e.g for teaching
Temporary data, e.g. intermediate results from a calculation
Solution
✅ Notebooks
✅ Code
❌ Large and/or shared datasets with read-write permissions – consider using Cloud Object Storage or other cloud-native storage solutions
✅ Text files
✅ Small datasets
✅ Configuration files
❌ Read-only datasets, e.g for teaching – consider placing these files in the
~/shareddirectory❌ Temporary data, e.g. intermediate results from a calculation – consider using the
/tmpdirectory
Shared directory#
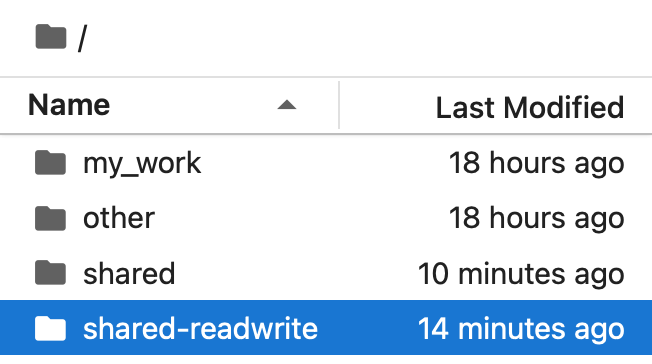
Fig. 10 The shared-readwrite folder appears for Hub Champions only.#
All hub users have access to a common shared directory from their home directory. This is a read-only directory where users can access large files or datasets for their work and its contents cannot be accidentally modified or deleted.
Hub Champions can populate the shared directory by placing files in the shared-readwrite directory that appears only in their home directory.
Tip
Upload data to the hub
Upload files to the hub by
Clicking the  button at the top of the file explorer.
Clicking the  button at the top of the file explorer.
Download data from the hub
Download files from the hub by
Right-clicking on the target file/folder and clicking the  button.
Checking the box next to the target file/folder, clicking the  button, choosing the Export… option and confirming the filename in the following dialog box.
The /tmp directory#
The /tmp directory is used to temporarily store short-lived files. Any file placed in this directory will last for the duration of your session and will be deleted after you log out.
This directory is a SSD drive with fast read-write access and up to 50 – 100 GBs of disk space. Ideal use cases for /tmp are for processing large datasets that do not need to be stored permanently.
Cloud Object Storage#
Your hub lives in the cloud, therefore another way to store data is using object storage such as Amazon S3 or Google Cloud Storage. This type of storage is ideally suited for persistent, large datasets that would be otherwise expensive to store on a traditional filesystem (i.e. your home, shared or /tmp folder) long-term.
This is an advanced topic beyond the scope of the current Hub Champion Training curriculum. More information can be found at the 2i2c Hub Service Guide.
Exercise: Data requirements
Think about the data that you or your community require for your/their work.
What type of data is it? E.g. tabular data (.csv, .xls), images (.png, .jpg, .bmp), other scientific data formats (.h5, .nc, .fastq)
How large is a typical dataset?
Where is the data stored?
Is the same dataset used by a group of collaborators?
Write up your thoughts in our shared collaborative document.
Share and manage code with GitHub#
GitHub is a popular hosting platform for creating, storing, managing and sharing code with collaborators. Code developed on a hub can be synchronised with a remote repository on GitHub, and changes are tracked in a process known as version control. This allows users to compare and even restore different versions of the code and facilitates collaborative work across different machines. Git is a version control tool that enables the synchronisation of code with GitHub. On a hub, version control of code is possible by using Git extensions to the user interface. Learn more about how to use these:
When a user pulls and pushes code to a remote repository on GitHub, they will be prompted to provide their GitHub credentials.
Warning
We do not recommend entering your GitHub credentials (GitHub password, personal access tokens or otherwise) on any kind of shared infrastructure (e.g. private and public cloud, HPC, any remote machine) as this information will be at risk.
For JupyterLab, we highly advise using gh-scoped-creds for authentication on our hubs.
Using gh-scoped-creds#
Authorisation to pull and push to GitHub is handled with gh-scoped-creds.
Open a Terminal.
Run the command
gh-scoped-creds.
The following prompt will appear
jovyan@jupyter-username:~/my-repo$ gh-scoped-creds
You have 15 minutes to go to https://github.com/login/device and enter the code: XXXX-XXXX
Waiting....
Copy the code from the prompt and paste it into login/device as instructed.
Authorise the hub to access GitHub by clicking the green button with the label Authorize
. You should now be able to pull and push to GitHub from the hub without entering your credentials.
Authorisation will automatically expire after 8 hours (or when your JupyterHub server stops), and you’ll have to repeat these steps to renew.
Hint
If you receive a Permission denied error after following these steps, then gh-scoped-creds has not been enabled for your hub. Hub Champions should refer to the steps in Enabling gh-scoped-creds for your hub.
Enabling gh-scoped-creds for your hub#
If this is not already enabled for your hub, then there are some extra steps for Hub Champions to enable gh-scoped-creds (requires GitHub Organization owner permissions).
Check that
gh-scoped-credsis not already enabled for your hub by opening a Terminal and runningjovyan@jupyter-username:~$ echo $GH_SCOPED_CREDS_CLIENT_ID
If this returns nothing, then follow the next step.
If this returns a client ID of the form
Iv1.xxxxxxxxxxxxxxxx, then go to Step 3.
Send a ticket to the 2i2c support desk and log a feature request for
gh-scoped-creds. 2i2c will create a GitHub App, provide a public URL of the GitHub App and update the hub configuration to make theGH_SCOPED_CREDS_CLIENT_IDandGH_SCOPED_CREDS_APP_URLenvironment variables available in your hub.Check that the GitHub App is installed to your GitHub Organization/GitHub personal account that owns the repositories you would like access to.
GitHub Organization: Navigate to the GitHub Organization used to manage access to your hub. In this lesson we are using the 2i2c-community-showcase GitHub Organization to manage access to the Community Showcase Hub.
GitHub personal account: Navigate to your personal GitHub repository that you would like access to on the hub.
Click on Settings > GitHub Apps.
Under Installed GitHub Apps, check whether the GitHub App URL provided by 2i2c matches an app in the list. In the screenshot below, the example GitHub App is called 2i2c Community Showcase Hub GitHub.

If the GitHub App is not installed, then follow the next step.
If the GitHub App is installed, then go to Step 5.
Install the GitHub App to your GitHub Organization (requires GitHub Organization owner permissions) or personal GitHub account.
Navigate to the GitHub App URL provided by 2i2c.
Click on the grey Configure button to install the GitHub app.
Select the GitHub Organization/personal account that you would like to enable
gh-scoped-credsfor.
Choose whether to enable
gh-scoped-credsfor all repositories or for only specific repositories and check thatRead and write access to codeis enabled.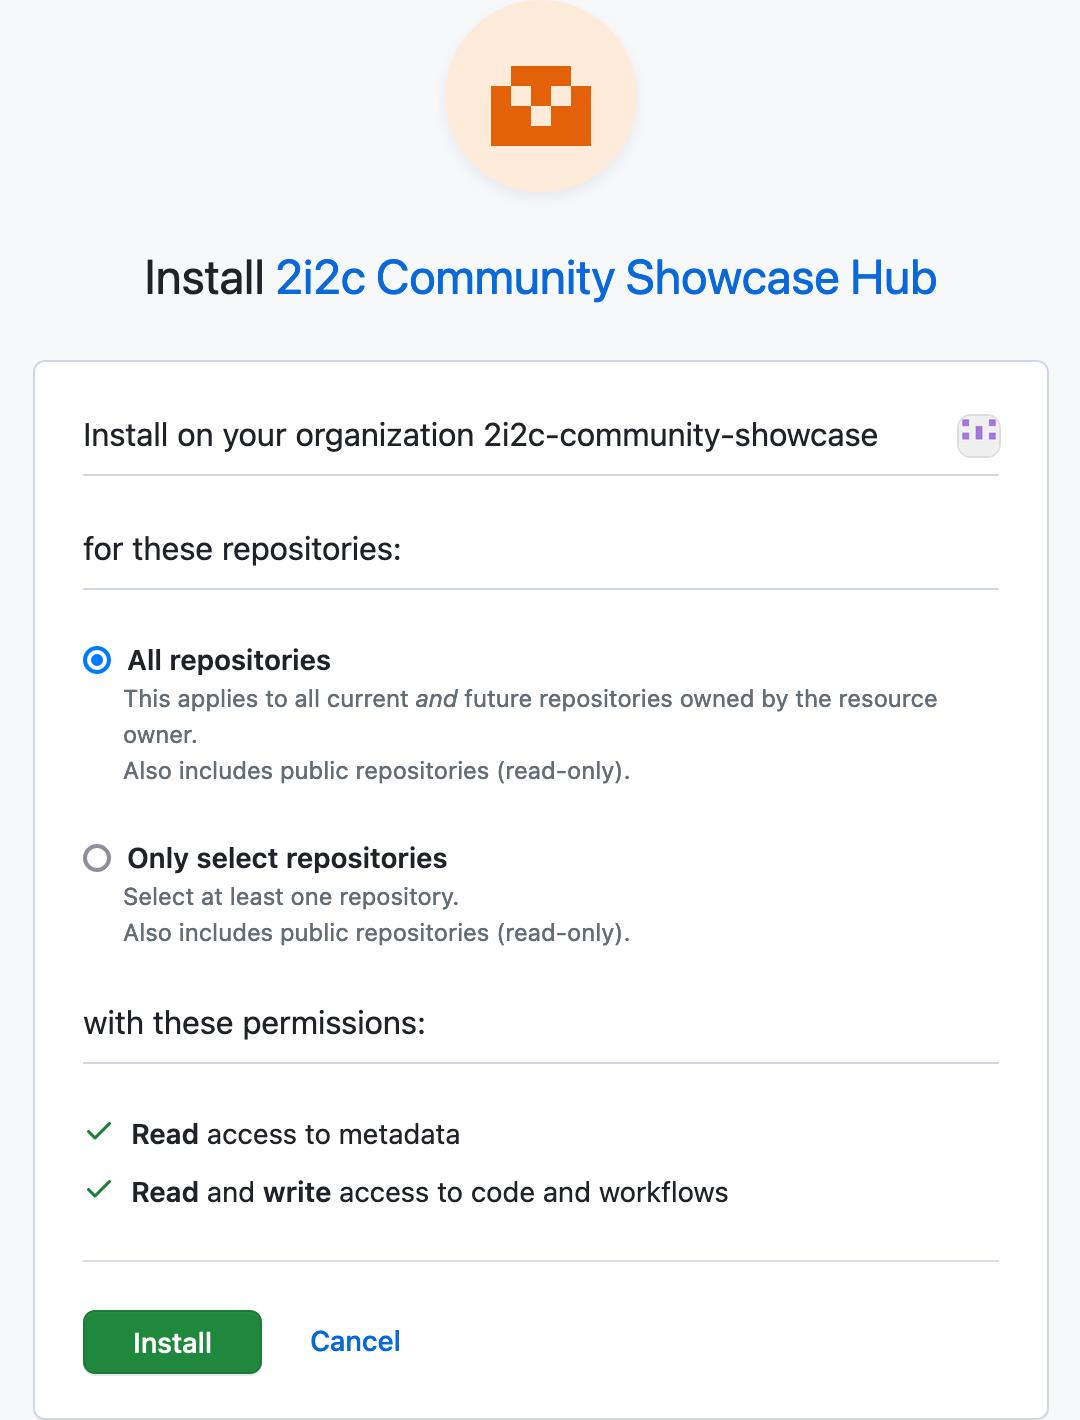
Click the green button labelled Install.
Check that the
gh-scoped-credspackage is installed in your image on the hub.Launch a server with your desired image.
Open a Terminal.
Run the command
gh-scoped-creds.Continue with Using gh-scoped-creds as normal.
If you see
bash: gh-scoped-creds: command not found, then thegh-scoped-credspackage is not installed in the image selected for your server. See the Hub Service Guide - Customize a community-maintained upstream image to add packages to a community-maintained upstream image.
Exercise: Push GitHub code
You use the Git JupyterLab extension to push code to a remote repository on GitHub and the following box opens:
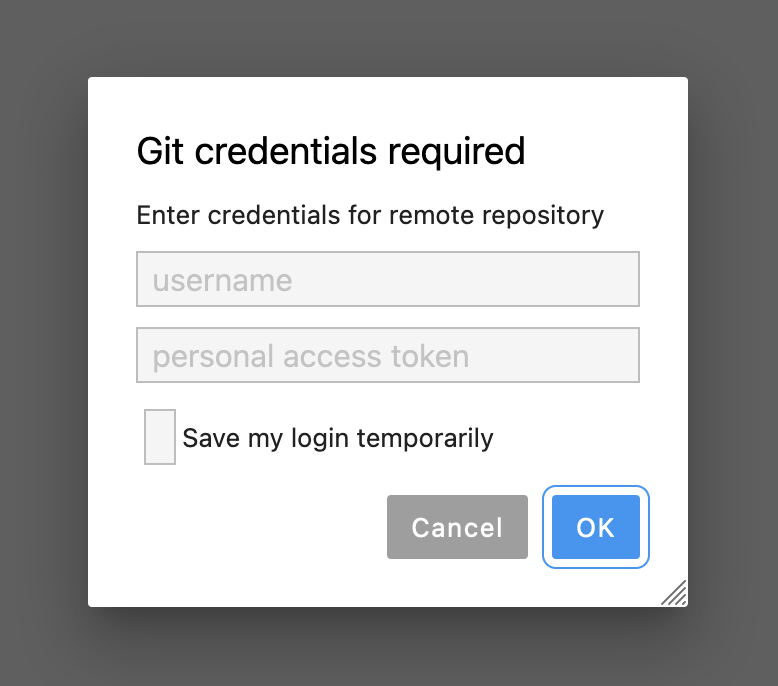
What should you do?
Enter your GitHub username and Personal Access Token as requested, then click Save my login temporarily
Click Cancel, open a Terminal, enter the command
gh-scoped-credsand follow the prompt
Solution
The correct answer is 2 – never enter your GitHub credentials (GitHub password, personal access tokens or otherwise) on any kind of shared infrastructure (e.g. private and public cloud, HPC, any remote machine) as this information will be at risk.
🔑 KEY POINTS
Users can store small files and datasets in their home directory that will persist between sessions.
Hub Champions can distribute datasets in a read-only shared directory.
Temporary data for intermediate files can be stored in the
/tmpdirectory.Cloud object storage can be used to store large datasets.
Use
gh-scoped-credsto push and pull code to GitHub.
Attention
Please prepare for the Part Two of the workshop by completing Exercise 1 of the next episode before the synchronous session.